CoolWallet Pro now once again supports staking Polkadot (DOT) in secure cold storage. Here’s what you need to know about the original Web 3 blockchain and how to earn DOT staking rewards in 2023 and 2024 with CoolWallet and Polkadot.
Contents
- Introduction
- CoolWallet DOT Staking Is Back!
- How to Stake DOT on CoolWallet in 5 easy steps
- 4 Easy Steps To Unstake Your DOT
- General Guide to Polkadot Staking on Self-Custody Wallets
- What is Polkadot (DOT)?
- How does Polkadot work?
- Understanding Polkadot
- What is Kusama?
- What is Substrate?
- What is Web 3.0?
- Who are the founders of Polkadot?
- Which Ethereum Problems does Polkadot Solve?
- How Do I Stake DOT?
Introduction
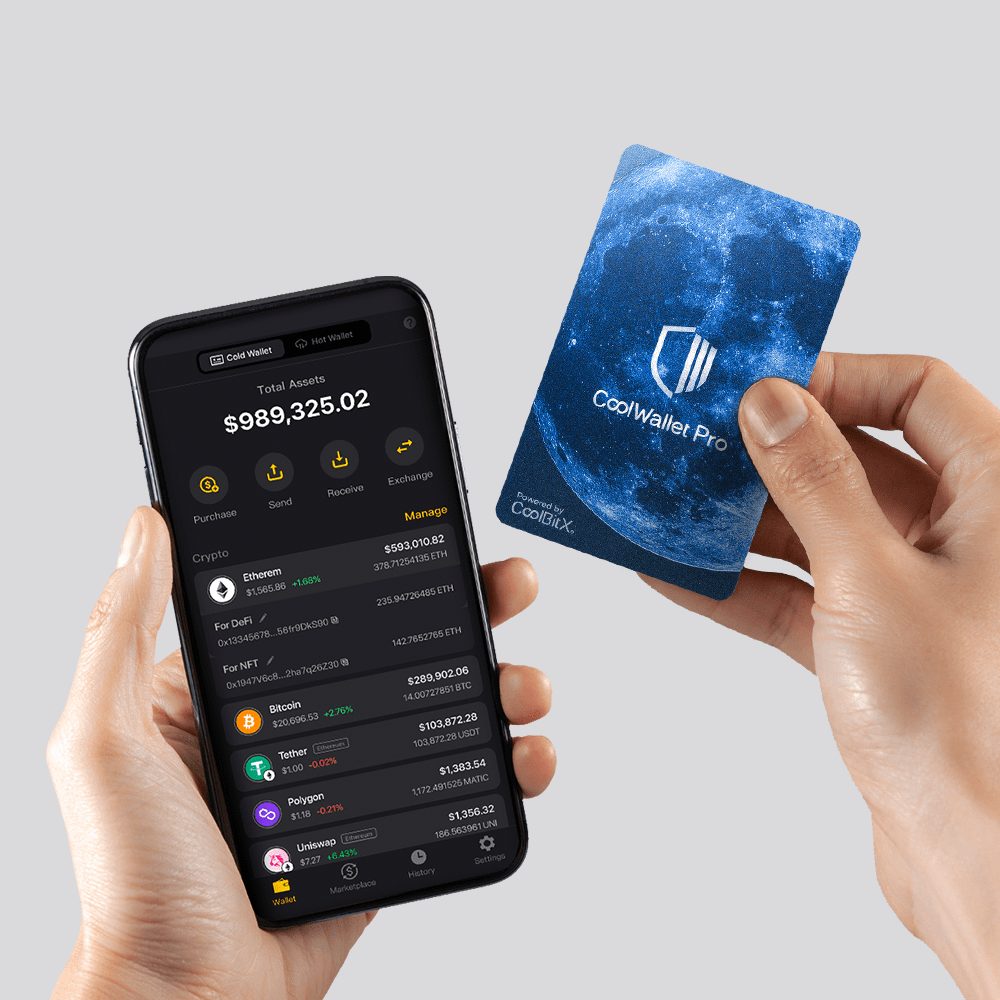
Great news! You can now natively stake Polkadot (DOT) on CoolWallet Pro, our top Web3 hardware wallet, thanks to our new partnership with top validator and staking service provider P2P.org. CoolWallet users can enjoy both P2P.org’s institutional-grade staking solution and CoolWallet’s cutting-edge security technology, which combine to make one of the most secure and user-centric solutions in the crypto space.
Check further below how to set up native DOT staking in our CoolWallet App (or read our step-by-step DOT staking guide) and start earning a healthy APY in DOT as reward.
As part of this Polkadot Staking Guide, we’ll also look at some of the new changes to Polkadot staking, and more about the expansive DOT universe, what the project is and how it works, key concepts like parachains, and Kusama to understand.
(Read our Tezos crypto staking guide here)
(Here’s how to stake Cosmos (ATOM) on the CoolWallet Pro)
CoolWallet DOT Staking Is Back!
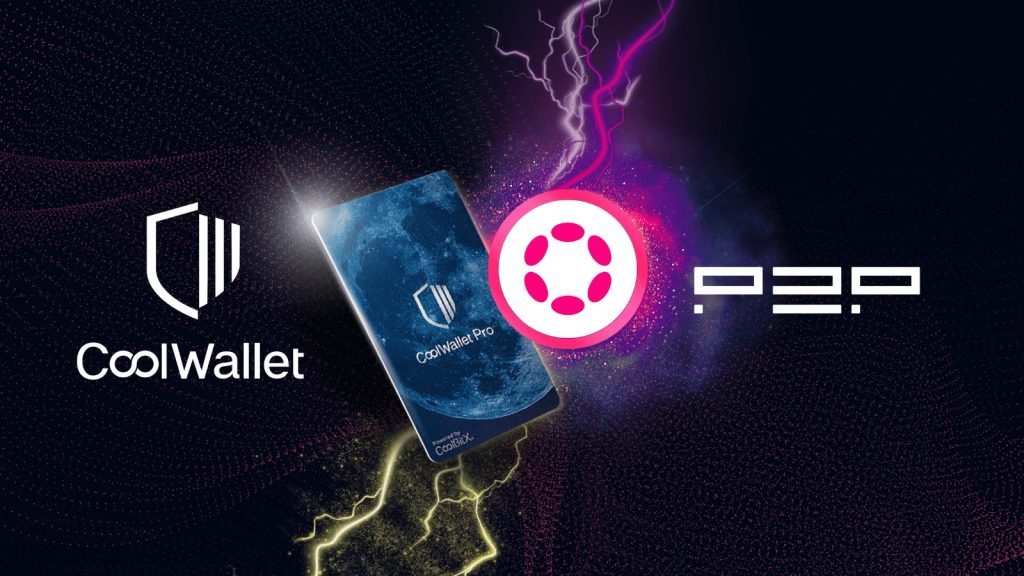
CoolWallet has partnered with leading Polkadot validator P2P.org to develop our new DOT staking feature, and our users can now stake DOT on CoolWallet App in a quick process which includes steps to bond your wallet & nominate a validator. Please note that the unstaking process includes a Chill & Unbond period.
Founded in 2018, P2P.org is dedicated to providing staking services and has emerged as a leading proof-of-stake validator and RPC node provider. P2P.org assists investors in compounding their cryptocurrency investments and offers high uptime, secure staking with advanced monitoring and support.
Why picking the right validator is super-important
A Polkadot validator is a crucial participant in the Polkadot network, responsible for validating transactions and creating new blocks. Validators play a key role in maintaining the network’s security and integrity. They are selected based on the amount of DOT (Polkadot’s native token) staked on them by themselves and nominators. Validators earn rewards for their services, which are shared with their nominators.
However, they also face penalties, or “slashing,” for any misconduct or network security breaches. Being a validator requires technical expertise, a reliable infrastructure, and a commitment to the network’s ongoing stability and efficiency. This is why we’ve teamed up with a trusted service provider like P2P.org.
Ready to put your bag of Polkadot to good use? Great!
Here’s how to stake DOT using the CoolWallet App and CoolWallet Pro in a few easy steps.
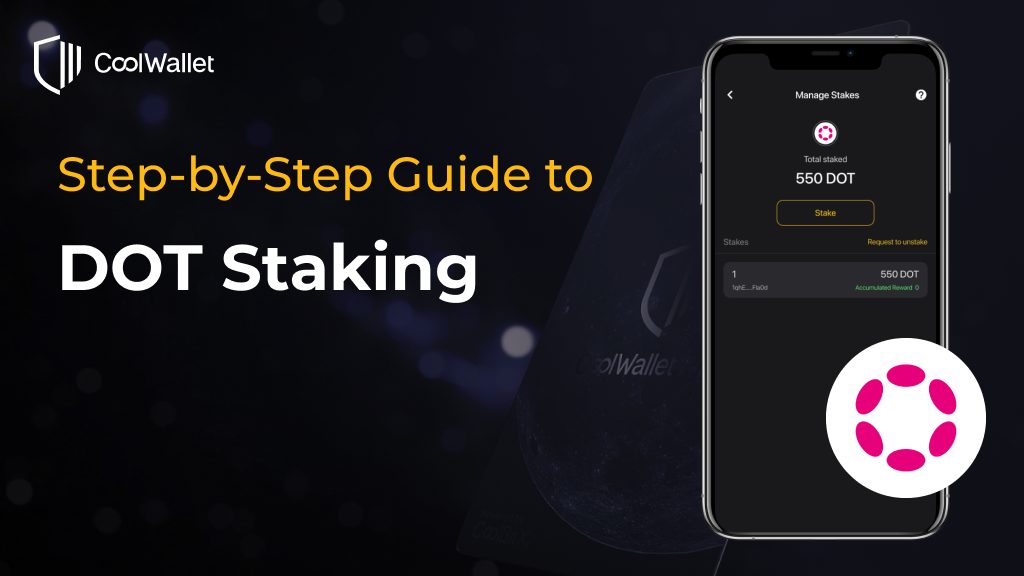
How to Stake DOT on CoolWallet in 5 easy steps
–> Want to see screenshots? Click on our visual guide here
Step 1. Download the latest CoolWallet App in the iOS App Store or Google Play Store and have your CoolWallet Pro ready.
Step 2. Open the app and go to the “Marketplace” section at the bottom. Select “Staking” and “DOT”. Finally, click on the “Stake” button.
Step 3. Enter the amount you wish to stake. It’s important to be aware that Polkadot staking utilizes a “bag list mechanism”. For a detailed understanding of how this mechanism works, you can watch the official video.
There are specific minimum requirements for staking: one for nomination and another to begin earning rewards. You can check the latest staking requests on the official Polkadot dashboard.
To successfully stake DOT, you’ll need to complete two transactions: “Bond” and “Nominate.” Click on “Continue” to proceed and follow the verification process to finalize the “Bond” transaction.
Step 4. Once you’ve successfully completed the “Bond” transaction, proceed to finalize the “Nominate” transaction.
Step 5. Now, all that’s left to do is wait for your rewards to accumulate! Enjoy the benefits of DOT staking with CoolWallet.
FAQs
What should I do if I’ve completed the “Bond” transaction but not the “Nominate” transaction?
No worries! You can simply click on “Action pending, click here to proceed” on the “Manage Stakes” page and choose “Nominate” to complete the “Nominate” transaction.
How can I check if my staking amount is insufficient to earn rewards?
You’ll see a reminder on the “Manage Stakes” page that says, “Please click here to reconfirm your staking status” if your staking amount is below the minimum requirement or close to it. Simply click on the reminder to add more to your staking amount and ensure you can accumulate rewards.
4 Easy Steps To Unstake Your DOT
Step 1. To unstake your DOT, you’ll need to complete two transactions. Click on “Request to unstake”, select the item you wish to unstake and click “Continue” to proceed.
Step 2. After that, complete the verification process and click “Got it” for the second transaction, which is “Unbond.”
Step 3. Once the “Unbond” transaction is completed, you’ll need to wait for your assets to be unfrozen.
Step 4. When your assets are unfrozen, you’ll see a reminder saying “Unlocked, please tap to retrieve your asset” on the “Manage Stakes” page. Click on it and follow the steps to withdraw your staking assets.
FAQ What should I do if I’ve completed the first transaction but not the “Unbond” transaction?
No worries! You can simply click on “Action pending, click here to proceed” on the “Manage Stakes” page and choose “Unbound” to complete the “Unbound” transaction.
What to Know About Polkadot Staking
General Guide to Polkadot Staking on Self-Custody Wallets
Let’s explore the world of Polkadot staking in a bit more detail so you can understand how the magic works and why you should only use trusted and reputable wallets and validators. One word: Slashing!
Generally, starting your journey in Polkadot staking involves a few important steps:
- Set Up Your Wallet: A non-custodial wallet like CoolWallet that supports staking is essential.
- Exceed the Minimum Threshold – 250 DOT: To participate in nominating, you need at least 250 DOT. This is the basic requirement to get started and it’s recommended you have more.
- Select Validators: You have the option to bond and nominate your DOT to up to 16 validators. This decision is crucial as it impacts your potential rewards and risks.
Understanding Slashing
Slashing is a penalty mechanism in Polkadot. If a validator you’ve nominated acts against the network’s rules, you might lose a part of your staked DOT. It’s important to choose validators wisely, focusing on their reliability and track record.
Reasons for Missing Staking Rewards
There are several reasons why you might not see staking rewards:
- Manual Reward Claims: Rewards aren’t automatically distributed. Sometimes, you may need to claim them yourself.
- Active Set of Validators: If your nominated validators aren’t in the active set for a particular era, you won’t earn rewards for that period.
- High Commission Validators: Some validators take a 100% commission on rewards, leaving nothing for the nominators.
- Oversubscription: If a validator is too popular and you’re not among the top 512 nominators, you won’t receive rewards.
- Meeting the Minimum Threshold: There’s a cap on the number of nominators who receive rewards each era. Ensure your stake is above this threshold (currently 250 DOT) to qualify for rewards.
Staking with Smaller Amounts
Polkadot accommodates those with smaller amounts of DOT through Nomination Pools. This feature allows you to pool your funds with others, acting collectively as a single nominator. It’s an effective way to participate in staking without a large individual investment.
How Your Stake Supports Validators
In Polkadot, even though you can nominate multiple validators, typically your stake will support only one validator per era. The system strategically allocates your stake to optimize your reward potential.
What is Polkadot (DOT)?
Polkadot (DOT) is a blockchain network that aims to create an interconnected web of distributed ledger platforms that unite independent blockchains into a single, unified structure. Dubbed the “Ethereum-killer”, Polkadot is expected to solve Ethereum’s scalability issues, as well as other problems that plague the crypto space including interoperability and governance.
The protocol is built on a unique technological framework called Substrate, which is designed to support scalable cross-chain applications, empowering developers to build independent projects on the network with ease. The accessibility of Polkadot’s consensus algorithm also helps builders launch their projects with the security provided by the main network without incurring expensive mining costs. Polkadot’s protocol can also be upgraded so hard forks are therefore not needed.
Polkadot has a grand vision that is well-described on their website:
“Polkadot will enable a completely decentralized web where users are in control.
Polkadot is built to connect private and consortium chains, public and permissionless networks, oracles, and future technologies that are yet to be created. Polkadot facilitates an internet where independent blockchains can exchange information and transactions in a trustless way via the Polkadot relay chain.
Polkadot makes it easier than ever to create and connect decentralized applications, services, and institutions. By empowering innovators to build better solutions, we seek to free society from its reliance on a broken web where its large institutions can’t violate our trust.”
Polkadot website
How does Polkadot work?
Polkadot uses a “hub-and-spoke” architecture, employing two kinds of networks that compose the whole ecosystem: the relay chain and parachains. The relay chain serves as the network’s central blockchain platform, while parachains, or “parallelizable chains,” function as independent blockchain networks running in parallel with each other.
Parachains
Parachains can connect to the relay chain to access Polkadot’s hybrid proof-of-stake (PoS) system, which consists of a network of validators that ensure its integrity and security.
Relay Chain
The relay chain’s function is to streamline blockchain data from each parachain, enabling them to interpret the data and interact with other components of the system such as the governance mechanism, an attribute that is essential for interoperability.
Understanding Polkadot
The Polkadot universe is full of overly technical terms and concepts. Let’s try to keep it simple and look at the essential terms and concepts you should understand.
.png)
Parachains
Parachains are application-specific and independent networks that run in parallel with the main Polkadot chain. It is where developers build DApps powered by Polkadot-based smart contracts or other blockchain frameworks. Parachains can choose to implement the same consensus model from Polkadot’s relay chain to share its transaction throughput and scalability. However, they also have the freedom to implement their own economic models, allowing developers to build virtually any token with its own corresponding tokenomics. Polkadot will only support an estimated total of 100 parachains, making the awarding of them extremely sought after. How are parachain slots awarded to projects? Simply put, through community auctions where projects stake DOT. In June 2021, the Polkadot Foundation indicated that these auctions would start very soon.
There are two stakeholders responsible for ensuring the synergy between the relay chain and parachains: validators and collators.
DELIVERED EVERY WEEK
Subscribe to our Top Crypto News weekly newsletter
Validators
Validators are individuals or entities delegated by the network’s stakers to create each incoming block for the whole chain. They ensure the whole network’s security by verifying the accuracy and consistency of transactions to be stored in each block. In return, the network rewards them for their contribution via DOT cryptocurrency payments. However, they will also be penalized if they approve invalid transactions through a process called “slashing.”
Collators
Collators also work with validators in ensuring the network’s security by performing network maintenance functions for specific parachains. Collators’ main tasks include keeping a copy of all data coming from parachains, finalizing a list of transactions and other relevant parachain information for block creation, and checking the integrity of each parachain.
Launchpad
Polkastarter is Polkadot’s primary decentralized exchange (DEX) platform designed to connect multiple blockchain token pools and auctions frictionlessly. It is similar to Binance’s Launchpad as it allows new projects to raise funding from public investors through token launches.
Polkastarter also has its own token known as POLS, which allows holders to vote on important governance decisions such as future listings. POLS is also used for staking, paying for transaction fees, and accessing exclusive token pools.
What is Kusama?
Kusama is an interesting parachain whose main function is to act as Polkadot’s “canary network”, a designated sandbox for developers and builders to test their concepts. In other words, Kusama is a Polkadot testnet but with real, economic consequences.
Kusama, described as Polkadot’s “cousin”, and named after the polkadot-loving contemporary artist Yayoi Kusama, allows developers to perform realistic tests of their projects before they are eventually launched on the mainnet (Polkadot). The project has its own governance model, allowing community members to vote on important protocol decisions and upgrades, which makes it a phenomenal high-risk experimentation ground for Polkadot proposals.
What is Substrate?
Substrate is a web development framework used by developers to create blockchains. The Substrate framework is primarily being used to create the scalable blockchain logic implemented throughout the Polkadot network.
The framework is enabled by a modular, peer-to-peer networking stack that allows developers to implement high-speed database processes, which means that even interactions between different parachains can enjoy high transaction capacity.
Substrate serves as the backbone of the Polkadot network, with several parachain projects using it to build their protocol. It is also the recommended framework for developers that want to implement a governance model that achieves consensus and finality.
What is Web 3.0?
Substrate and Polkadot were envisioned to help give rise to Web 3.0, the forthcoming decentralized generation of the Internet, powered by artificial intelligence (AI) and open networks, making it more efficient and interconnected. Ultimately, Web 3.0 aims to take away corporations’ power to commercialize their consumers’ data, empowering users to take control.
Web 3.0 integrates machine learning technology to enhance web search algorithms and data analytics, allowing users to take advantage of the vast amount of information stored online with ease.
Notably, Web 3.0 tremendously impacts technologies that depend on the peer-to-peer exchange of information. Blockchain, open-source software, the Internet of Things (IoT), and other initiatives that push for decentralization will be some of the biggest beneficiaries.
Who are the founders of Polkadot?
Polkadot was founded by Dr. Gavin Wood, Robert Habermeier, and Peter Czaban in 2016 as a way to solve Ethereum’s PoW headaches and move it to Ethereum 2.0. Wood happens to be one of the co-founders of the Ethereum project, as well as Parity Technologies, which was initially aimed to build the core infrastructure for Ethereum but is now focusing on Polkadot’s ecosystem.
Another major backer for Polkadot is the Web3 Foundation, an organization that leads efforts towards building out the Web 3.0 decentralized Internet.
Which Ethereum Problems does Polkadot Solve?
Ethereum’s primary problem right now while it transitions to Proof of Stake Ethereum 2.0 in 2022 is scalability, which has led to slow transaction speeds and outrageous gas fees. As the number of Ethereum users grows, so does the network traffic, which is why the network is increasingly becoming more congested. Despite Ethereum’s popularity among DeFi projects, it won’t take long before users are discouraged from using Ethereum-based DApps since it is becoming increasingly difficult to break even while DeFi staking on these platforms.
Polkadot offers a more scalable network through its independent parachains working within the whole ecosystem. Parachains have their own blockchains, which means that the likelihood of congestion on Polkadot-based DApps is significantly lower, allowing them to charge ultra-low fees to facilitate network transactions.
Moreover, Ethereum doesn’t natively support other blockchains, making it a siloed network. Polkadot solves the interoperability issue by natively enabling cross-chain transfers of data and assets, allowing various projects to work together despite being built on different frameworks and networks.
How Do I Stake DOT?
One of the benefits of being a Polkadot holder is the ability to stake your DOT. This means that you lock your DOT for a specific amount of time and earn interest on it.
Staking your DOT prevents you from being able to transact with it but it also allows your stake to validate new transactions on the Polkadot blockchain, which you get rewarded for in more DOT. When you stake your DOT, you will get an Annual Percentage Yield (APY) on the amount that you stake. However, the APY on DOT is variable, so it’s important to do due diligence and find out what it is before staking.
Let’s look at 3 ways to stake Polkadot:
- Delegating (hard)
- Staking via an exchange (easy)
- Staking on a wallet like CoolWallet Pro (easy)
1. Delegating Your DOT
Polkadot uses NPoS (Nominated Proof-of-Stake) as its consensus mechanism for choosing the validator set and is designed with the roles of validators and nominators, to provide optimal chain security. Parties interested in helping to maintain the network can run a validator node.
The first and most complicated method of staking Polkadot is to set up a validator node. Validators are responsible for creating new blockchains on the Polkadot network. Validating is a complicated procedure with a high technical barrier so it won’t be the correct option for some Polkadot stakers.
Most DOT holders will want to delegate their DOT by giving a validator the right to use it to validate transactions instead. This doesn’t mean you are giving away your DOT; it remains yours.
However, if a delegator acts maliciously, their total stake, including that of delegating users, will be “hard-slashed” and destroyed. So, it is prudent to share your stake across several validators to distribute your risk.
Once you delegate your DOT, you can unbond it anytime. However, the unbonding process takes 28 day until it’s finished. Only then can you withdraw your unbonded DOT.
Comparing Validators
There are two types of participants on the Polkadot staking system: validators and nominators. Nominators are responsible for appointing their stake to the validator. In Polkadot, there is a limit of 512 nominators that a validator is allowed to pay rewards to at one time. A validator with over 512 nominators is considered oversubscribed and only the first 512 nominators will be paid out.
It is important to do due diligence on the validator you select, since you do share their risk. Consider the following factors:
- Validator’s moniker: The name of the validator candidate.
- Validator’s description: Description provided by the validator operator.
- Validator’s website: Link to the validator’s website.
- Initial commission rate: The commission rate on revenue charged to any delegator by the validator.
- Commission max change rate: The maximum daily increase of the validator’s commission. This parameter cannot be changed by the validator operator.
- Maximum commission: The maximum commission rate this validator candidate can charge. This parameter cannot be changed by the validator operator.
- Minimum self-bond amount: Minimum number of DOTs the validator candidate needs to have bonded at all times. If the validator’s self-bonded stake falls below this number, the staking pool will collapse. This protects delegators from the validator pulling the rug out from under them.
- Governance voting: Delegators can vote on governance issues. This vote is independent of your validator but if you elect not to vote then your voting power goes to your validator.
How to Delegate
After choosing a validator, the easiest way to delegate your DOT is through your chosen app. If you’re using PolkaWallet, from your Polkadot wallet, you will need to select “Staking” on the bottom bar and select “Bond +” in the middle right screen, under “Available”. Then, choose your bond amount and submit it. Next, go back to the staking tab on the bottom of the screen and select “Validators” on the top right and select “+ Set Nominees”and pick anywhere from 1-16 validators. After choosing validators, press “submit transaction”, input your password and confirm. Once you’ve delegated your assets to your selected validator, just sit back and watch the interest roll in after about 3-20 days.
2. Staking via a centralized exchange
If delegating sounds a little complicated, there is a simpler option. Many crypto exchanges, including Coinbase and Binance, offer to stake DOT on behalf of their clients. Although the benefit of this approach lies in its simplicity, users should be aware that you are trusting the exchange with your DOT, potentially over a long period. They will also charge a larger fee than if you were staking yourself.
Before staking with an exchange, you should make sure that you trust the exchange and that you accept the long-term losses that can be incurred by increased fees.
3. Staking on a non-custodial wallet like CoolWallet Pro
Why? A simple reason: Not Your Keys, Not Your Crypto.