How to Connect Your CoolWallet to MetaMask?
Firmware versions 2.37.0 (or newer) supports MetaMask integration, and you can now connect your CoolWallet pro to MetaMask. Here is the step-by-step guide we prepared for you. Let’s get started!
Download CoolWallet and MetaMask
CoolWallet Pro: Download the latest CoolWallet App or update your CoolWallet App to 2.37.0 (or newer) firmware version. Download on the App Store / Download on the Google play
MetaMask: Google Chrome, Firefox, Brave and Edge browsers are supported by MetaMask. Install the newest MetaMask extension on the Chrome web store for your PC/ MAC/ Linux computers. You can learn more details on the MetaMask Support.
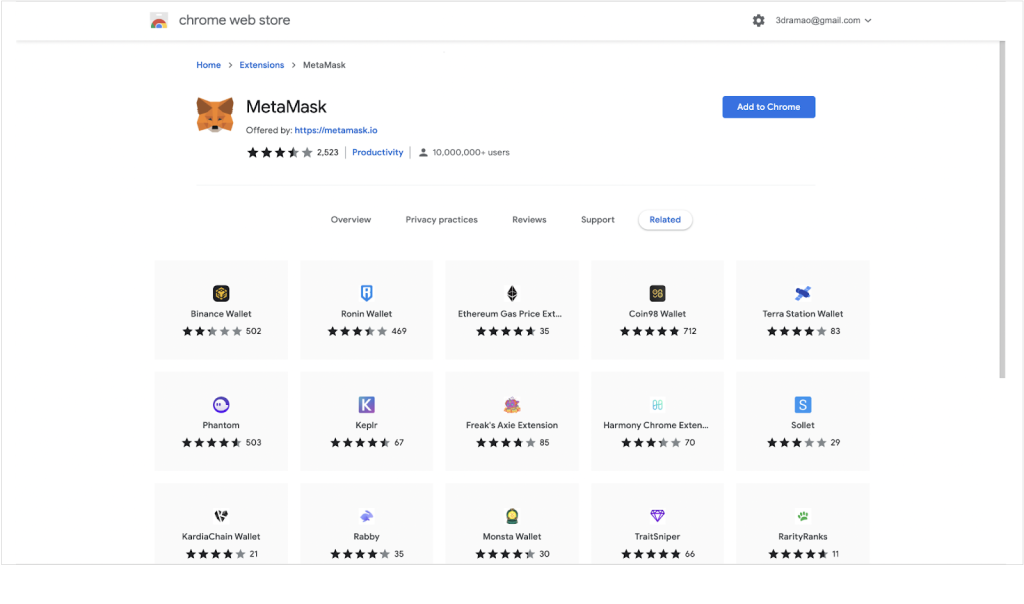
Set Up Your MetaMask
Step 1. Run the MetaMask Extension. Click on [Get Started]
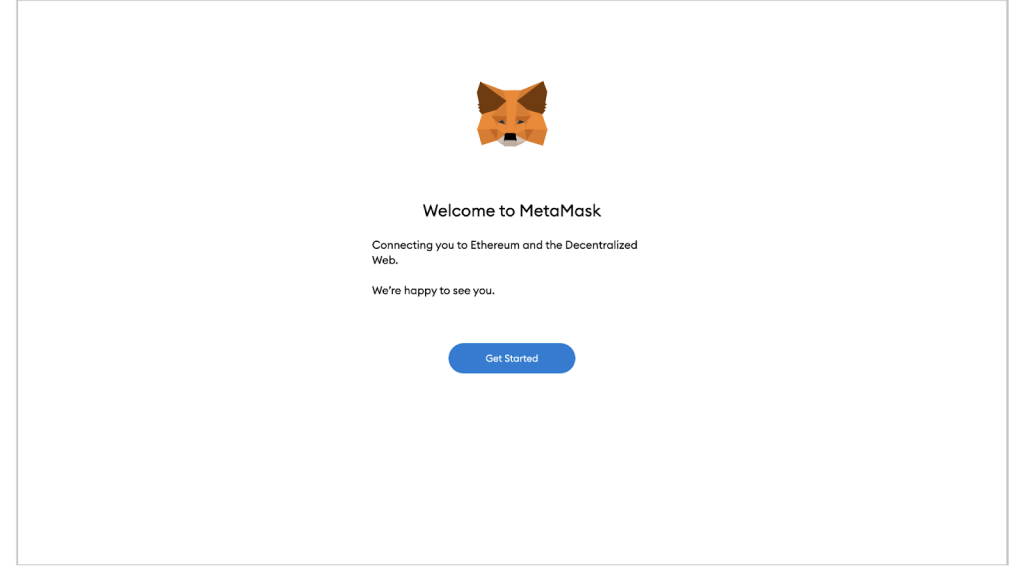
Step 2. Choose [Import Wallet] or [Create a Wallet]. Here we will choose [create a Wallet] for first-time users as a demonstration.
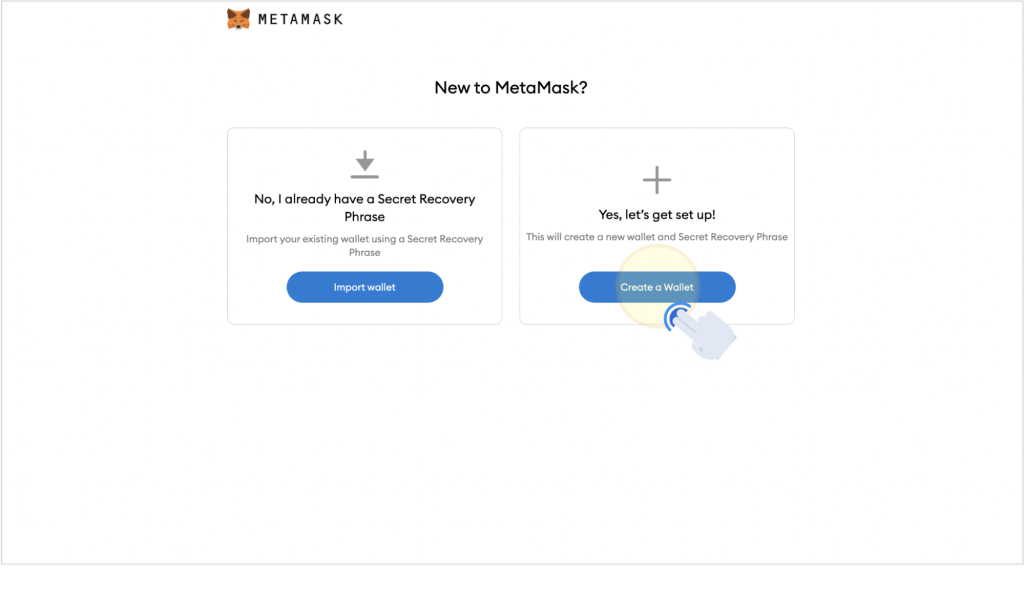
Step 3. Set up your new password → Accept the Terms of Use → Click on [Create].
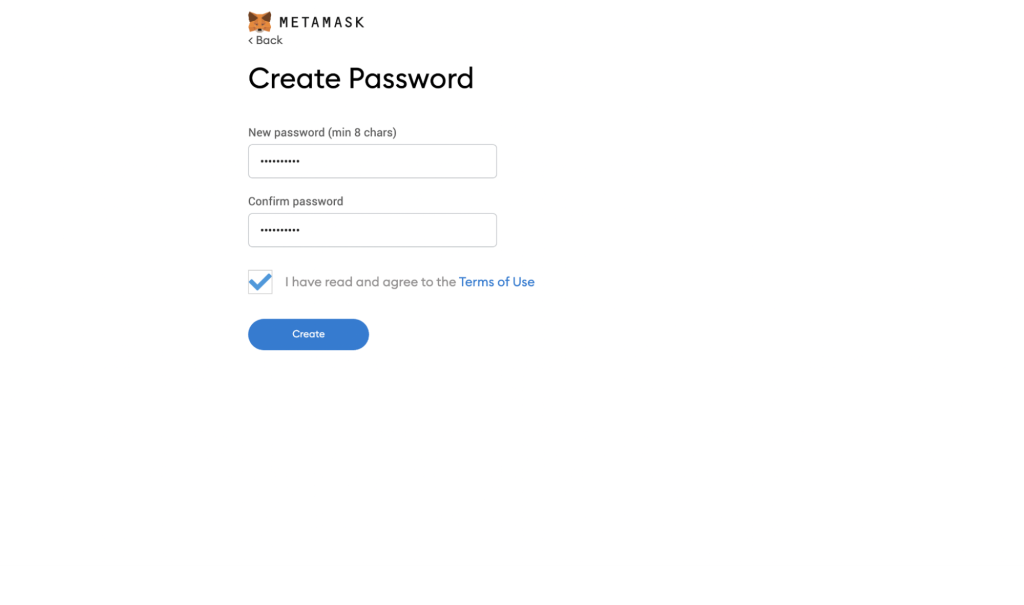
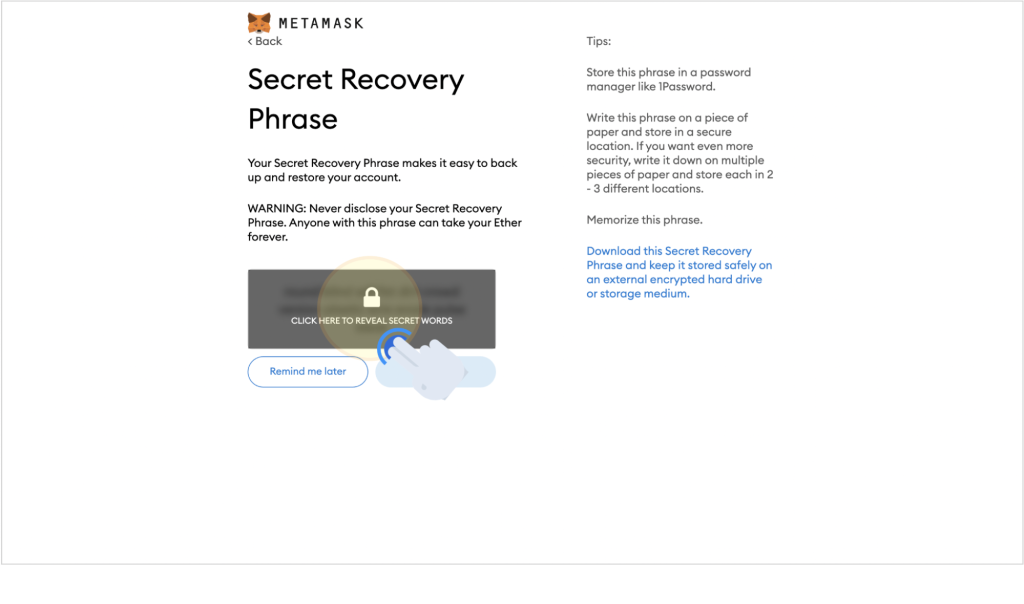
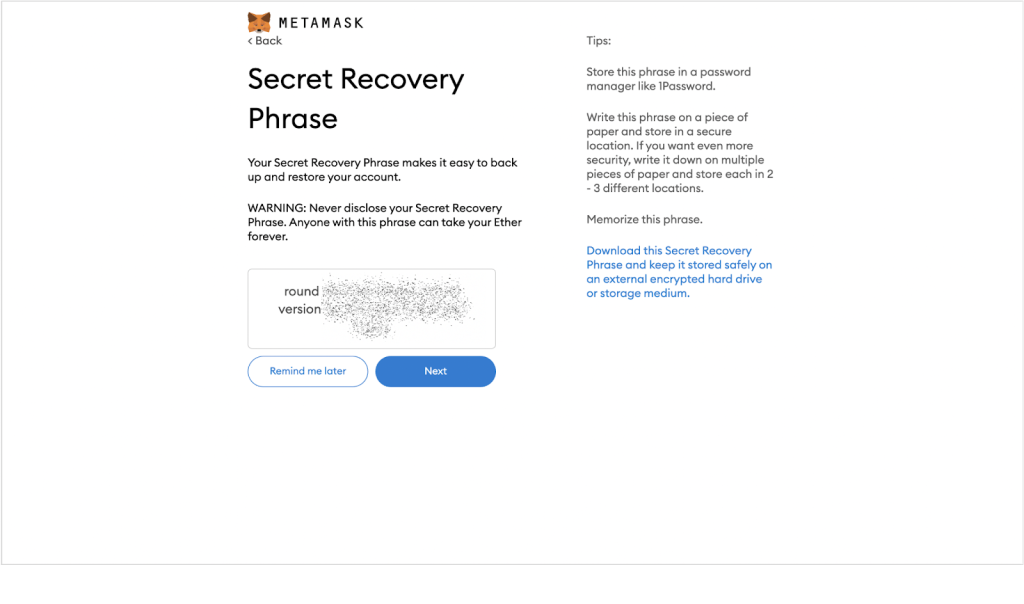
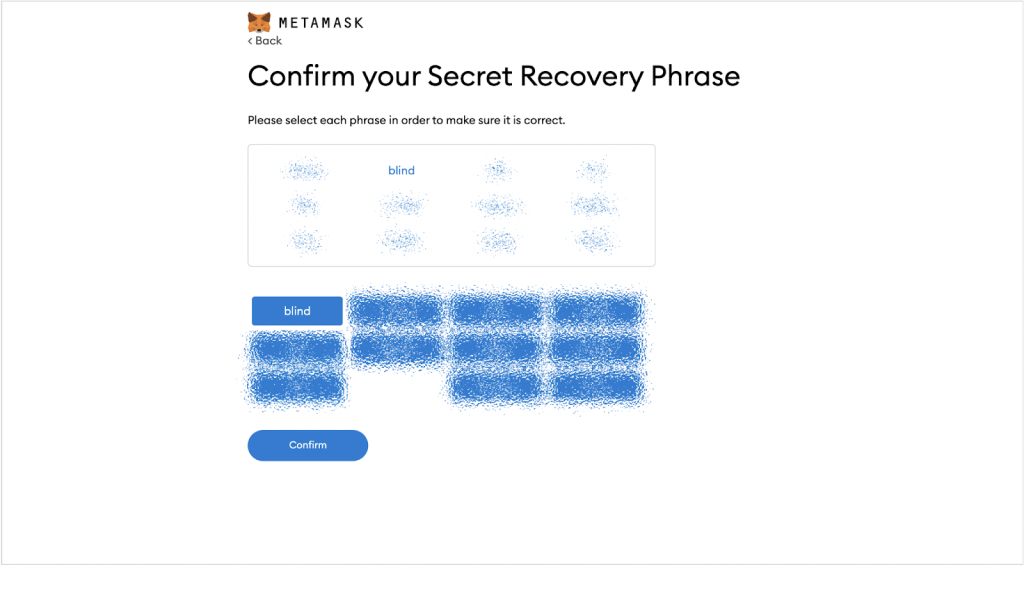
Step 4. Click on [CLICK HERE TO REVEAL SECRETS WORDS] and keep them somewhere safe, then click on [All Done].
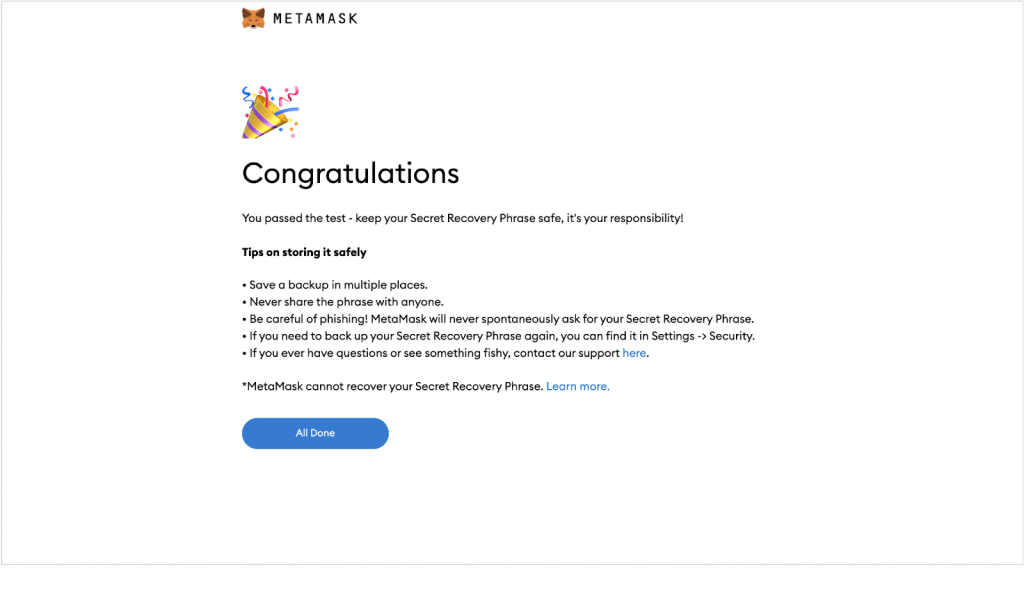
Step 5. Once the wallet is set up, you can enter the MetaMask mainpage.
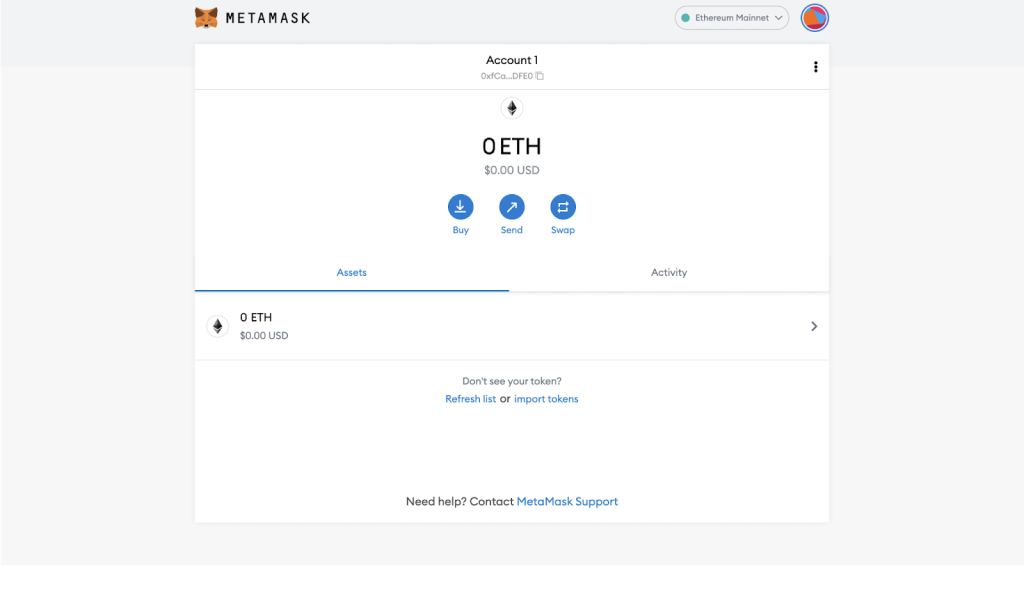
Connect CoolWallet to Metamask
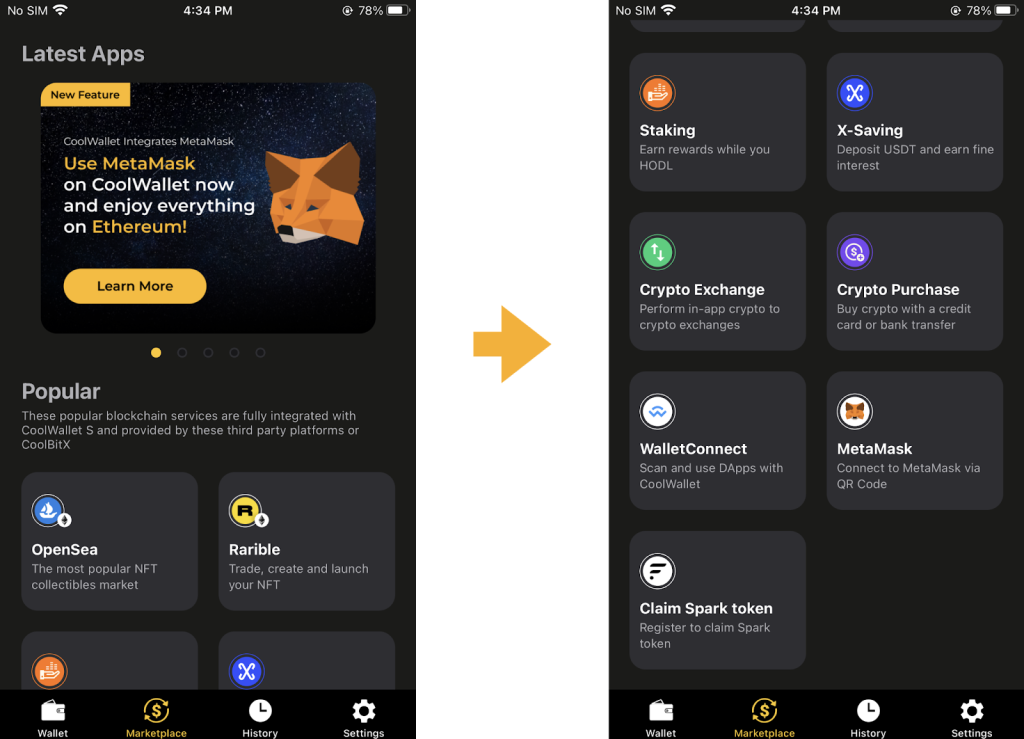
Step 1. Open CoolWallet App and click on [Marketplace] → [MetaMask]
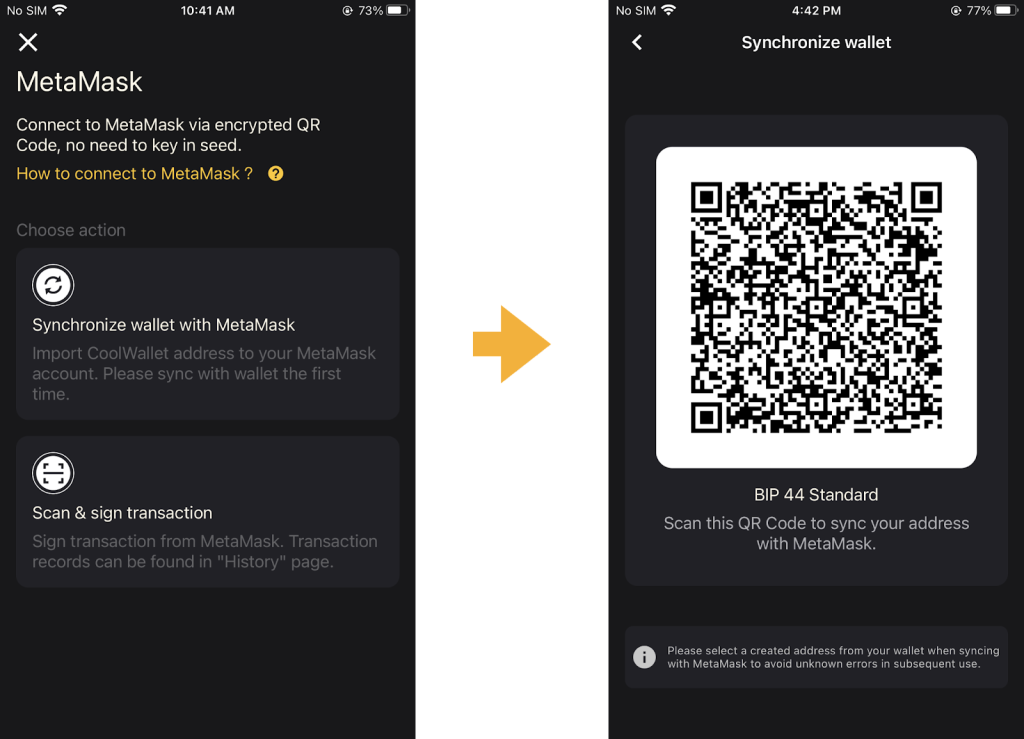
Step 2. Choose [Synchronize wallet with MetaMask ] then QR Code will be shown.
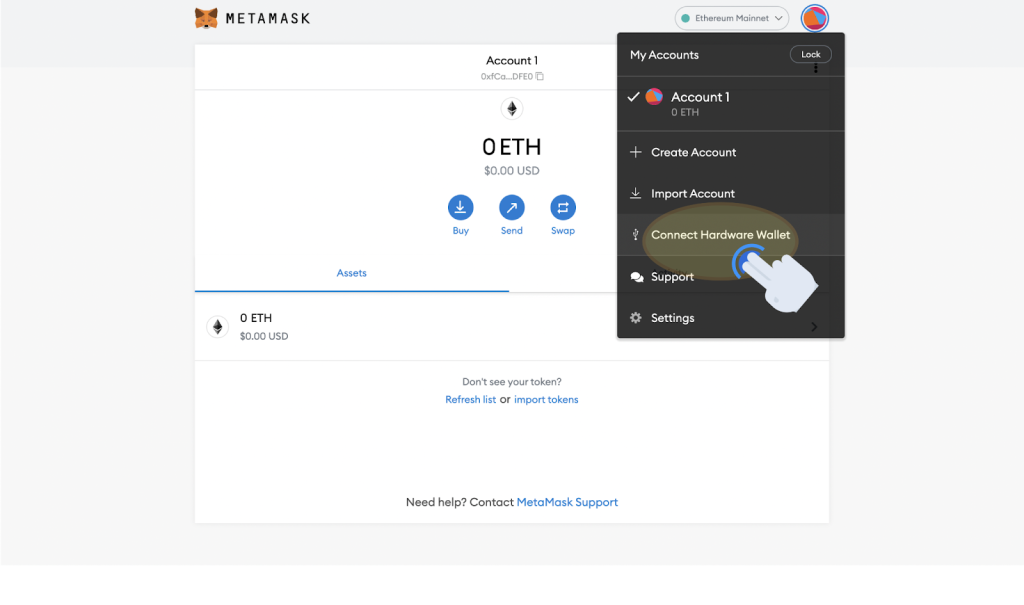
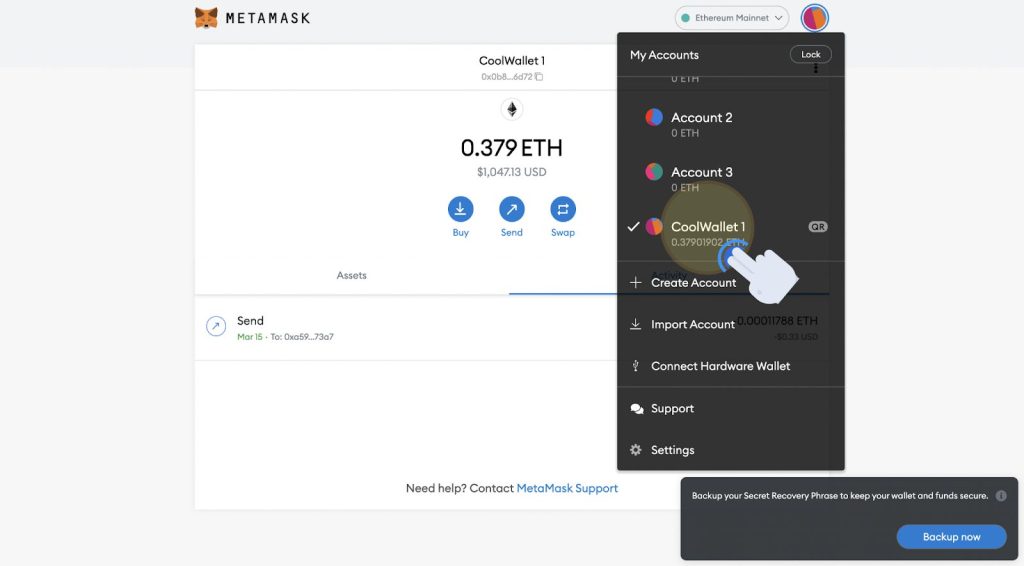
Step 3. Click on [My Accounts] → [Connect hardware Wallet] at the top- right corner.
Step 4. Click on [QR-based] → [Continue]
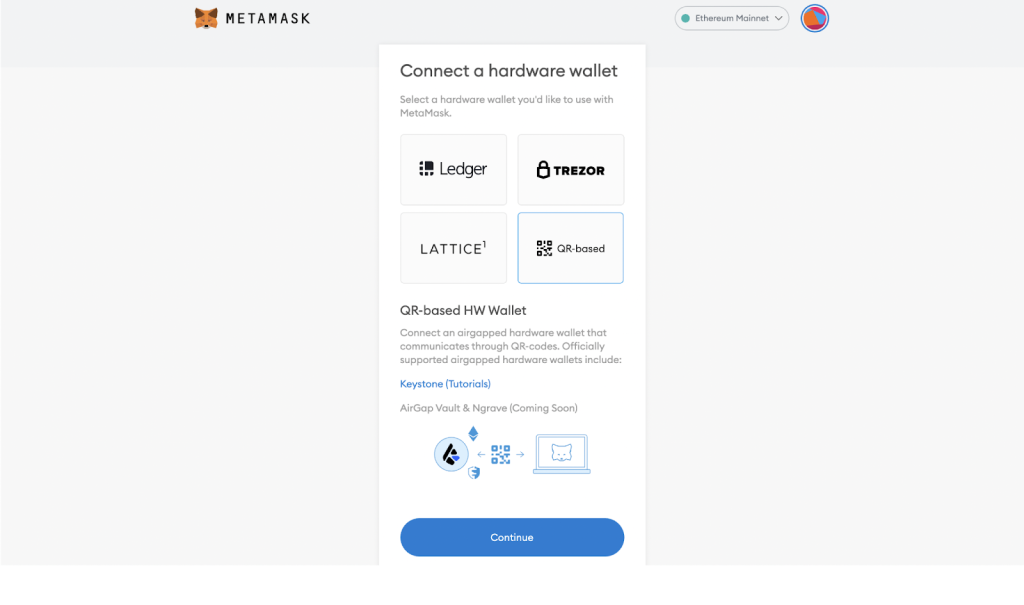
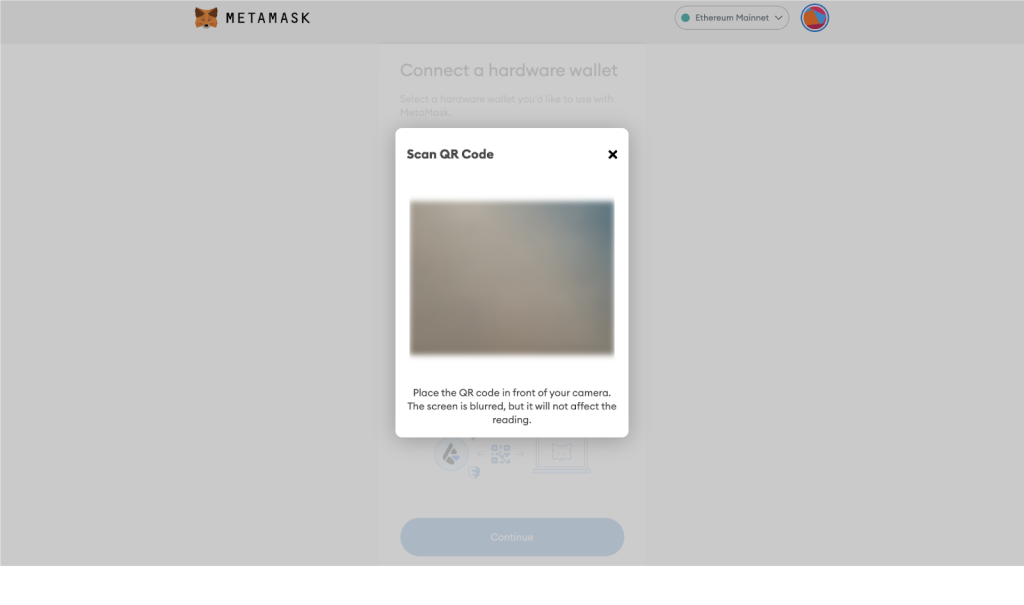
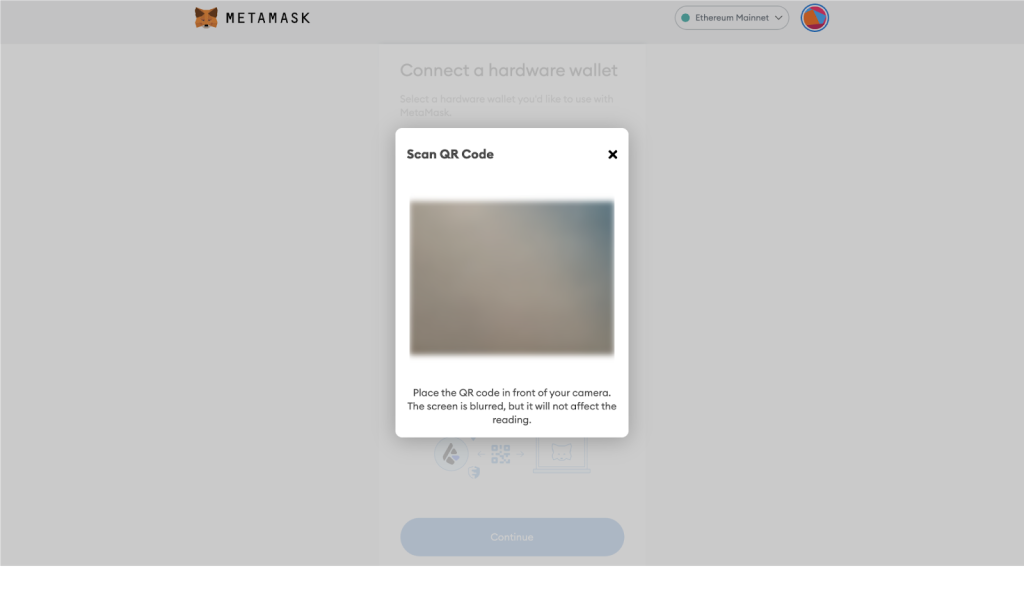
Step 5. Place the QR Code displayed on the CoolWallet App in front of your computer camera. (The screen is blurred, but it will not affect the reading)
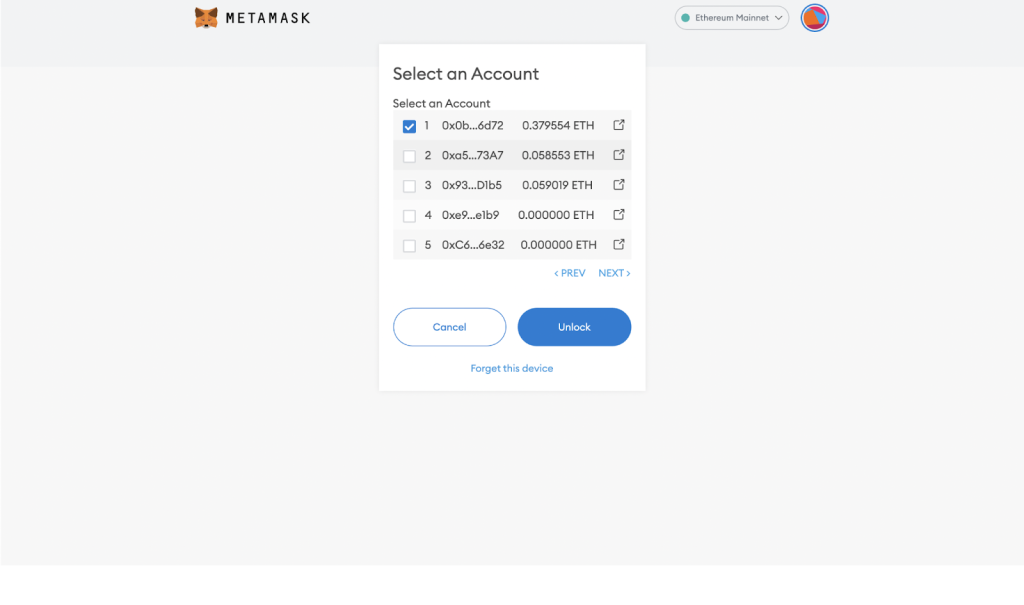
Step 6. Select an account (wallet address) and click on [unlock].
Step 7. If CoolWallet is shown in [My Accounts] at the top-right corner, it means it is successfully connected.
Sending Transaction by MetaMask
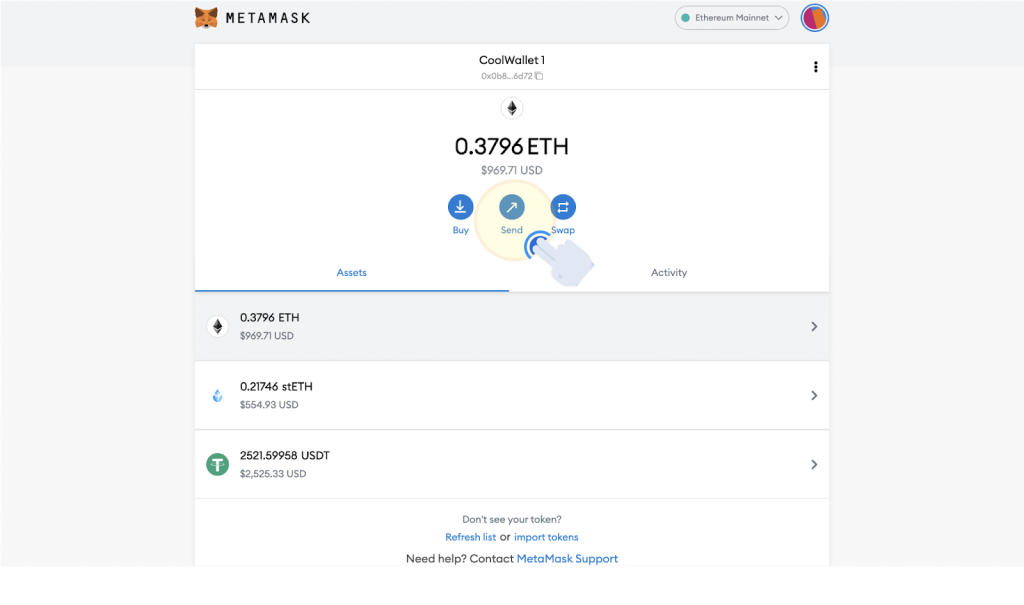
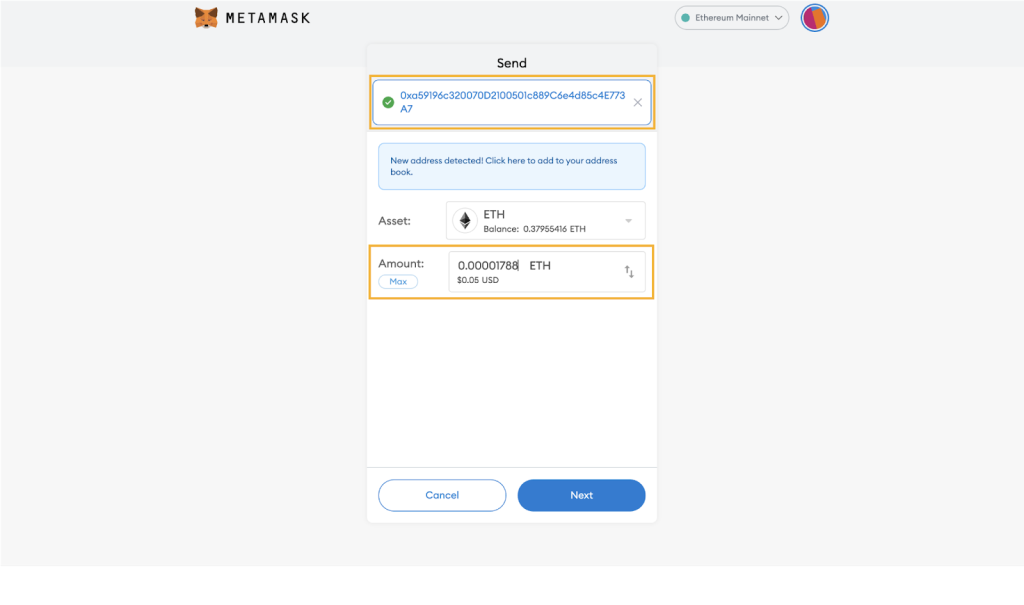
Step 1. Click on [Send] then enter the associated address in [send to address] and enter your desired amount in [Amount], then click on [Next].
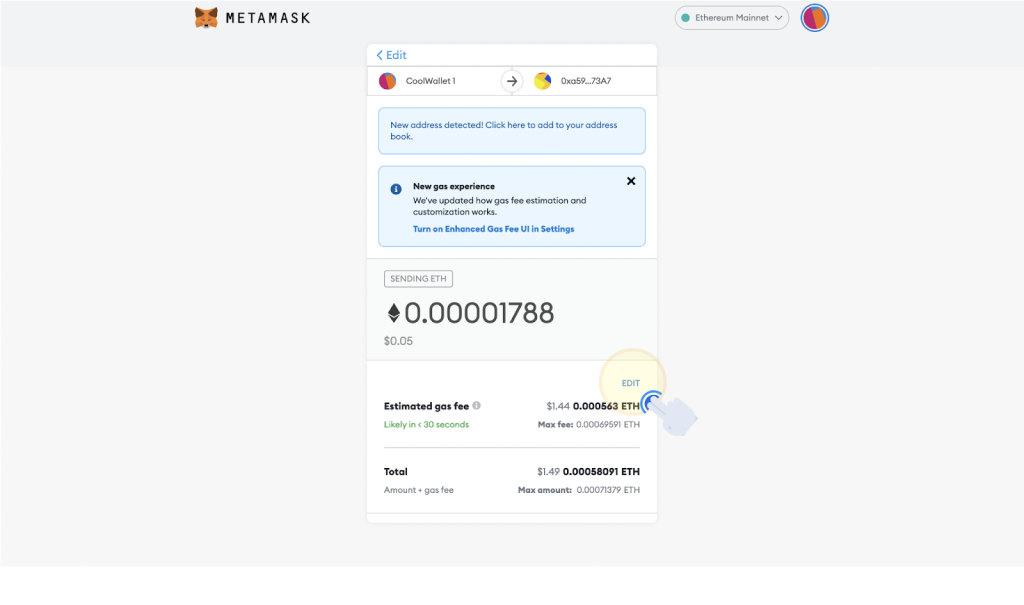
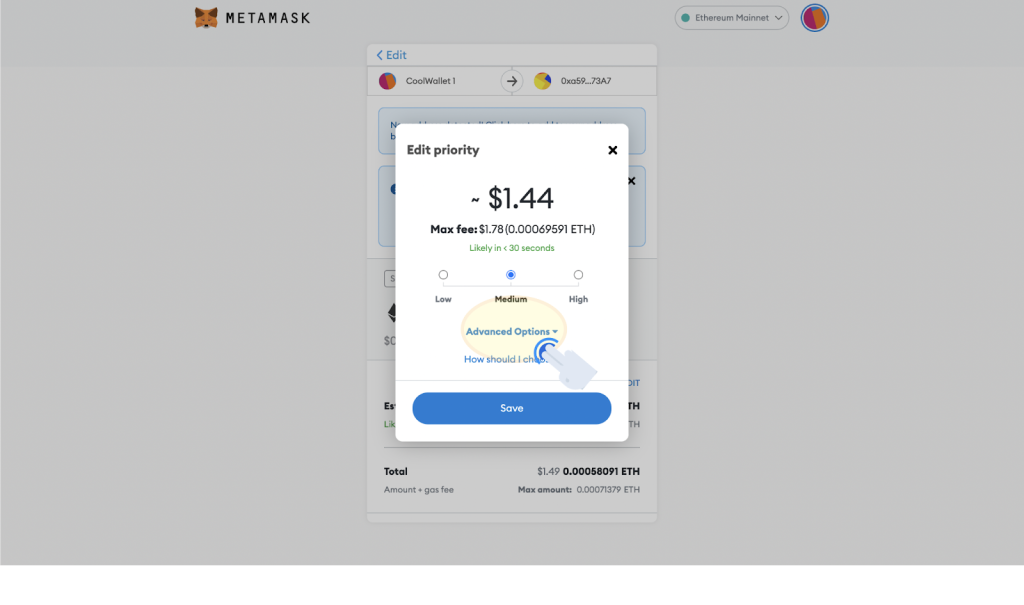
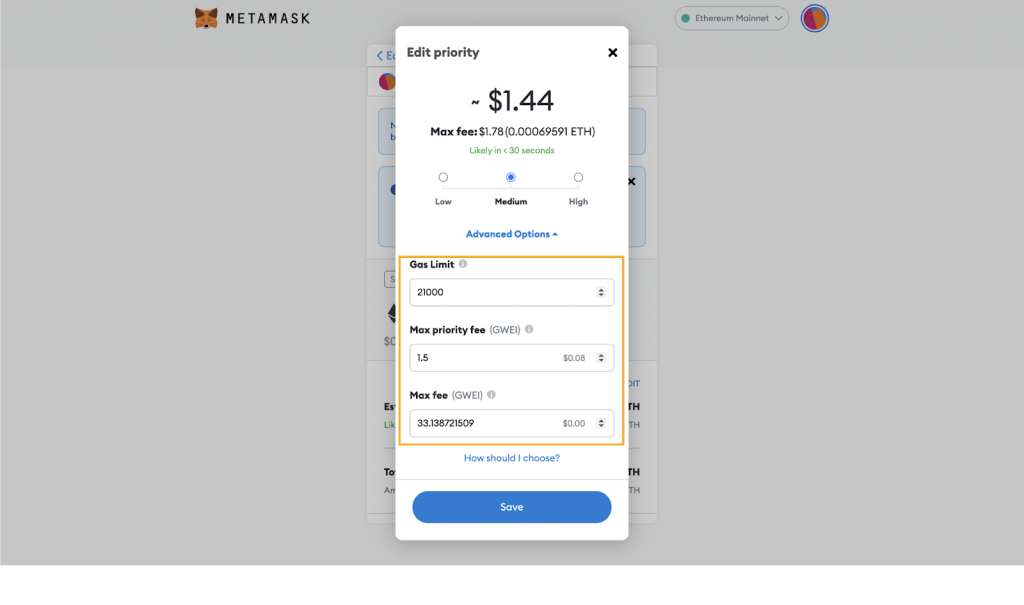
Step 2. Click on [EDIT] → [Advanced Options] to set up your transaction.
- Priority fee is paid to miners and incentives them to prioritize your transaction. You can raise the amount to speed up the transaction process.
- Max fee is the total amount of your transaction, including base fee, priority fee, and buffer fee for any rapid changes.
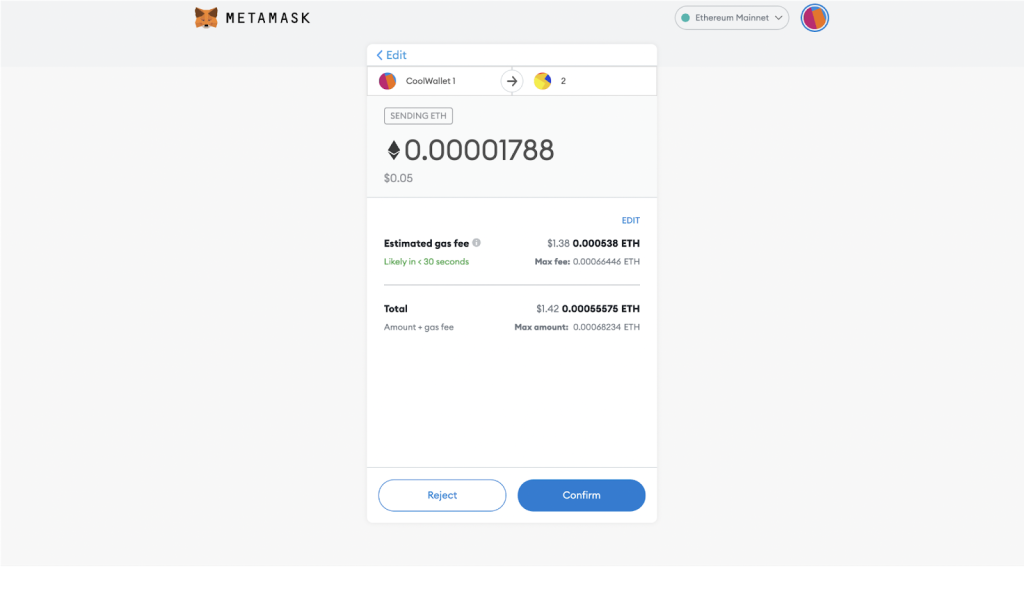
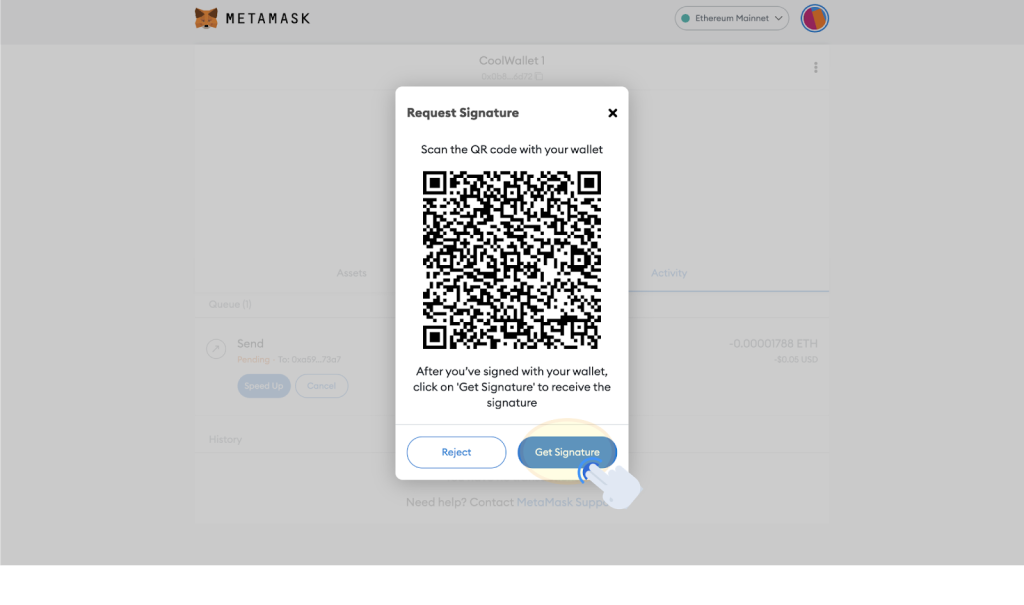
Step 3. After confirming all the transaction details, click on [Confirm], then you will get a [Request Signature] QR Code.
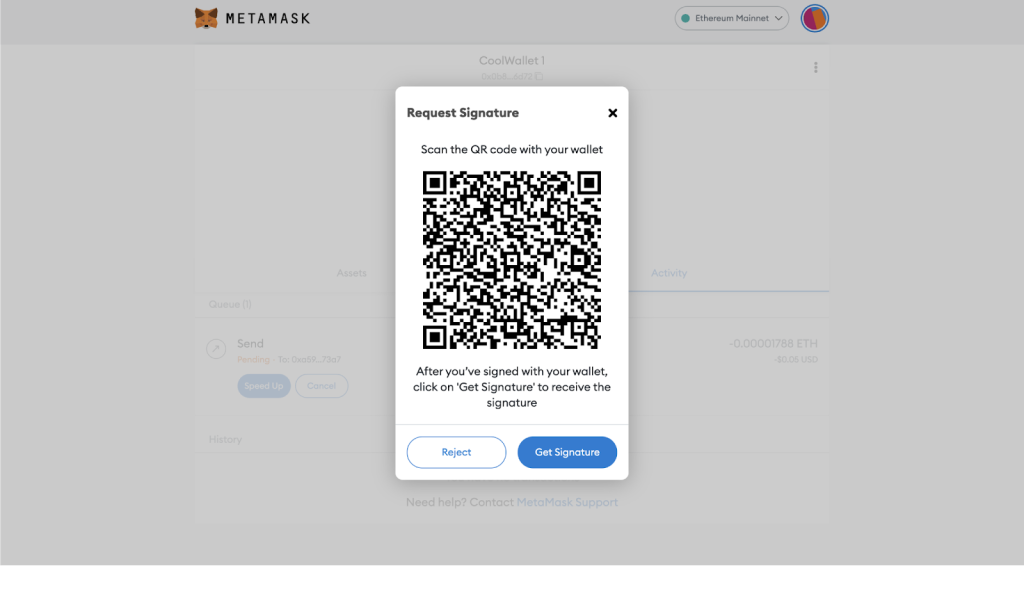
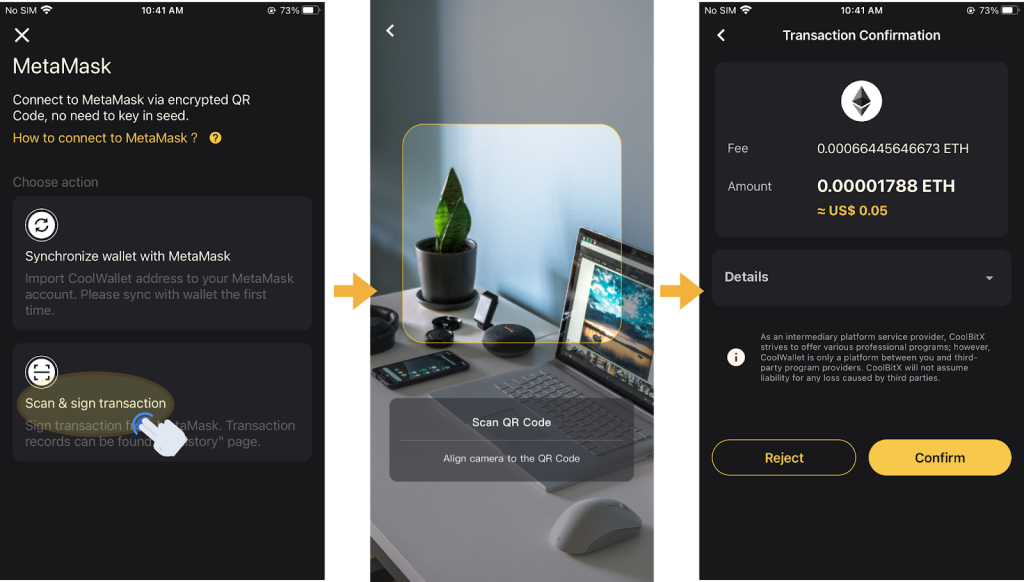
Step 4. Open CoolWallet App and click on [Marketplace] → [MetaMask] → [Scan & sign Transaction], and scan the QR Code displayed on the MetaMask. After confirming your transaction, click on [Confirm] and follow the steps shown on the CoolWallet app to connect your card for transaction confirmation. After the confirmation, the QR Code will be shown, and Please click on [Done] after scanning it.(If you click on [Done] before scanning it, your transaction will be canceled. You have to re-do the transaction again to get the QR Code.)
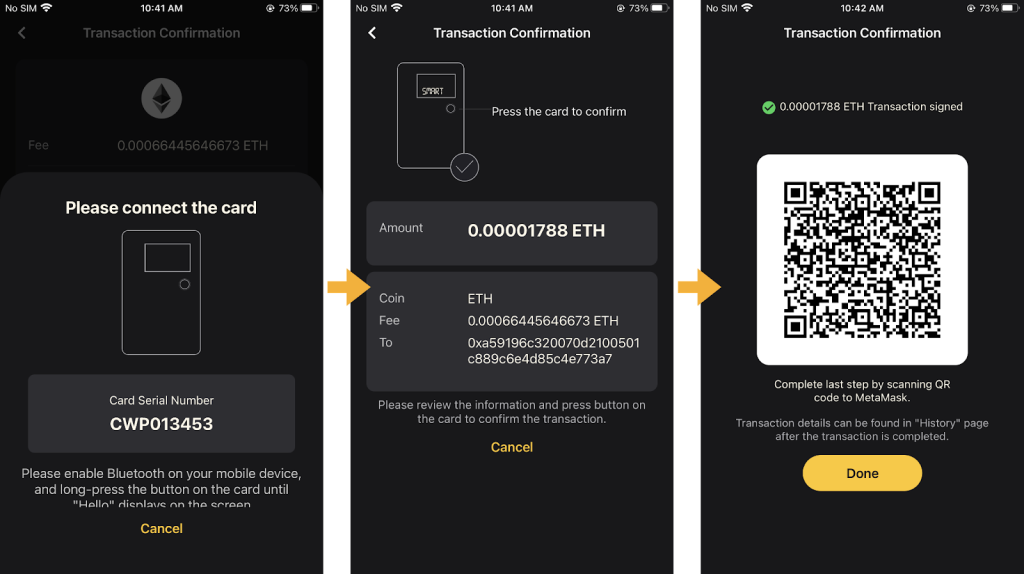
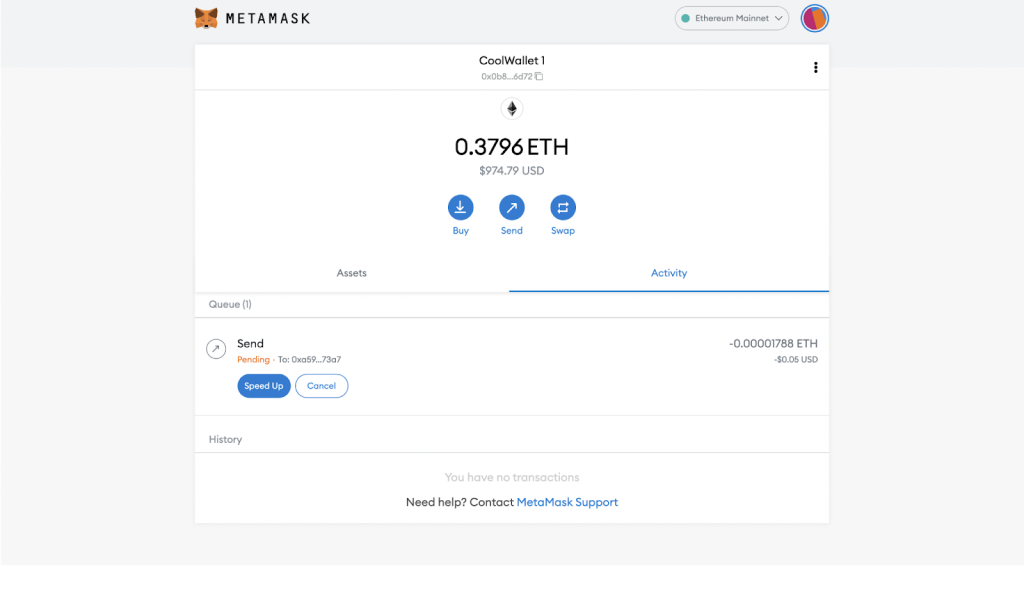
Step 5. Click on [Get Signature] on the MetaMask and scan the QR Code on the CoolWallet App. Once the scan is completed, the transaction will be broadcast onto the ETH blockchain.
We hope this guide helped you. If you have any questions please see our Help Center!
